Starter Tips for Tomato Season 2016!

Tomato Harvest September 2015Well, I am pushing the envelope again this year.

Last April I decided to plant my tomatoes right around Tax Day. Admittedly, I don’t like that day but I love tomatoes so I think I used that day in the garden as a little fiscal therapy. I figure what I lost in one arena I could gain in another more delicious one. Indeed, I had a whopper of a season last summer…one of my best ever.

Well, the same urge stoked me this week and I decided to gear up and plant early.  Seattle is seeing some unprecedented warm and sunny weather. So I got my act together, purchased some great tomato starts as Swanson’s Nursery on Thursday and planted my tomatoes on Sunday.

tomatoes 2 2015

Are you gearing up? Well, here are a few of my random tomato season starter tips.

Location, Location, Location

Without a doubt, commandeer the sunniest southern most corner of your yard. I have tried many locations and I’ve had my best results in a raised bed near the house and adjacent to a brick wall. The house and the wall bounce heat back onto the tomatoes and the southern facing location gets sun all day.

Make the Bed

Regardless of whether you use a raised bed or just a garden bed, it’s important to amend the soil before you plant. Add some compost, manure, worm castings, and/or organic fertilizer. I often have my son pick up truck loads of compost at the nursery but bagged compost works too. As for worm castings? If you don’t have a worm bin going, you can get bagged earthworm castings too. They are ridiculously high in nutrients and I am convinced they are a key component. As for fertilizer, I am very partial to Dr. Earth Home Grown Tomato, Vegetable and Herb. A dry fertilizer, this product is great simply sprinkled alongside the plants during the season and at planting time. .

Varieties

Choosing the right varieties for your climate and your family’s dining preferences is critical. I am very partial to heirloom varieties and a few of my favorites hail from Eastern Europe. I love Cosmonaut Volkov, Moskvich, Stupice, Black Krim.  All of these do well in our cooler climate and they produce consistently through October when our first frost generally hits.  Regarding dining preferences for your family, if you eat a lot of salads, then be sure to add some of the great cherry varieties on the market. They ripen reasonably quickly, they are easily tossed into salads without even being sliced, and they can be frozen whole for use in soups in the winter. Kids love cherry tomatoes and it’s an easy way to pump another vegetable into a kid-friendly menu plan.


Add Heat

If you live in a cooler climate, it is critically important to add a little heat to get your tomato plants going. Here in Seattle, I lean towards using a Wall of Water or a large cloche made from PVC piping and  plastic sheeting. Both methods work and both have advantages and disadvantages. Admittedly, I waffle between methods. I’ve used the PVC cloching method for years. The cloche covers the whole bed and the heat ramps ups quickly but I have to open and close the cloche daily to moderate the temperatures to be sure the tomatoes don’t accidentally sizzle if the day gets too hot. The Wall of Water lets me “cloche” each tomato individually but the walls can be a hassle to fill–you have to fill each tube with water and it can be tedious doing that, especially if you don’t have another gardener nearby.

I have lots of other tomato growing tips on deck so I will be posting those later in the week and as the season progresses. So stay tuned for more.


My Five Minute Yakisoba Noodles

Are you hard pressed to find quick dishes that easily incorporate healthy vegetables into the mix?

Indeed, I am challenged by this daily. My two athletic sons mow through the meals like there’s no tomorrow, and I am constantly challenged to find ways to work more greens into their diet.

Feeling fairly exasperated by the whole thing a few weeks ago, I resorted to the Asian noodle option. Shoreline’s Central Market had a large display of Asian ingredients on display for Chinese New Year and one of the sections featured the fresh Yakisoba noodles made here at Wan Hua Foods in Seattle. Alongside the noodles was OtaJoy Yakisoba noodle sauce. Admittedly, I fell for the marketing gimmick, grabbing the  store’s handy recipe card and buying the noodles and sauce.

Well, it was  a good move. These noodles, which sell for under $3 per two pound pack, are superb for quick and easy stir fries. The noodles can be used promptly after purchase or, even better, they can be frozen in smaller portions.

    I have found that the frozen noodles defrost quickly and cook just fine.

Rather than give you a strict recipe for my Five Minute Yakisoba Noodles, I am going to lay out the basic steps because this approach lends itself to adaptation and flexibility, leaving you, the cook, to incorporate bits and bobs of vegetables that you might have handy in the bin.

Five Minute Yakisoba Noodles

Step One: Chop fresh ginger, garlic and onion. I usually use about one to two tablespoons of each. Sliced scallion works great too.

Step Two: Chop miscellaneous vegetables into roughly one- or two-inch pieces. I’ve used snow peas, sprouting broccoli from my garden, celery from the fridge, sliced peppers and even a handful of bagged coleslaw mix.

Step Three: Drizzle some oil into a large skillet or wok. Preheat over moderately high heat until oil sizzles when water is flicked onto the oil. Add the garlic/ginger/onion mixture and stir quickly to heat. Do NOT let it burn.

Step Four: Add the mixed vegetables and cook, stirring for a minute or so, or until the vegetable start to turn a bright green. DO NOT overcook. Turn the heat down to moderate if it looks too hot.

Step Five: Add a handful of the noodles, breaking them up into strands as you add them. Grab a pair of tongs and toss. (Note: the noodles do not need to be precooked so that is part of the beauty of this recipe! Furthermore, you can adjust the quantity of noodles to suit your taste or dietary needs.)

Step Six: Add two or three tablespoons of the Yakisoba sauce, tossing quickly with the tongs.

So, it really is this simple to make a quick Asian noodle dish at home. I’ve made this many times since I first purchased the ingredients. My sons hardly notice the vegetables and the dish overall makes a great accompaniment to sliced steak or teriyaki chicken. Feel free to experiment.


February in the Garden: Organizing a Big Hot Mess of Seeds

Things are getting brighter here in Seattle. We are scheduled for a full week of sun this week and by next Monday, which is President’s Day, we should be gearing up to plant our first round of spring peas.

Compost 2016This weekend we had a “family work party” in the garden. This involved wrangling teenage boys out of the house and into the garden. One of those teenagers picked up and hauled home two cubic yards of steamy Cedar Grove compost which was spread on my raised beds. We also had a family lesson in mechanics because my youngest son learned how to fix the wheel on the secondhand wheelbarrow. Family dynamics took a turn for the worse when it came time to deal with the big messy compost heap in the corner of the yard. I feed that heap with leaves, clippings, and coffee grounds through the winter.  No one likes that arduous and sloppy task but the worms, those quiet garden workhorses, needed a little attention.
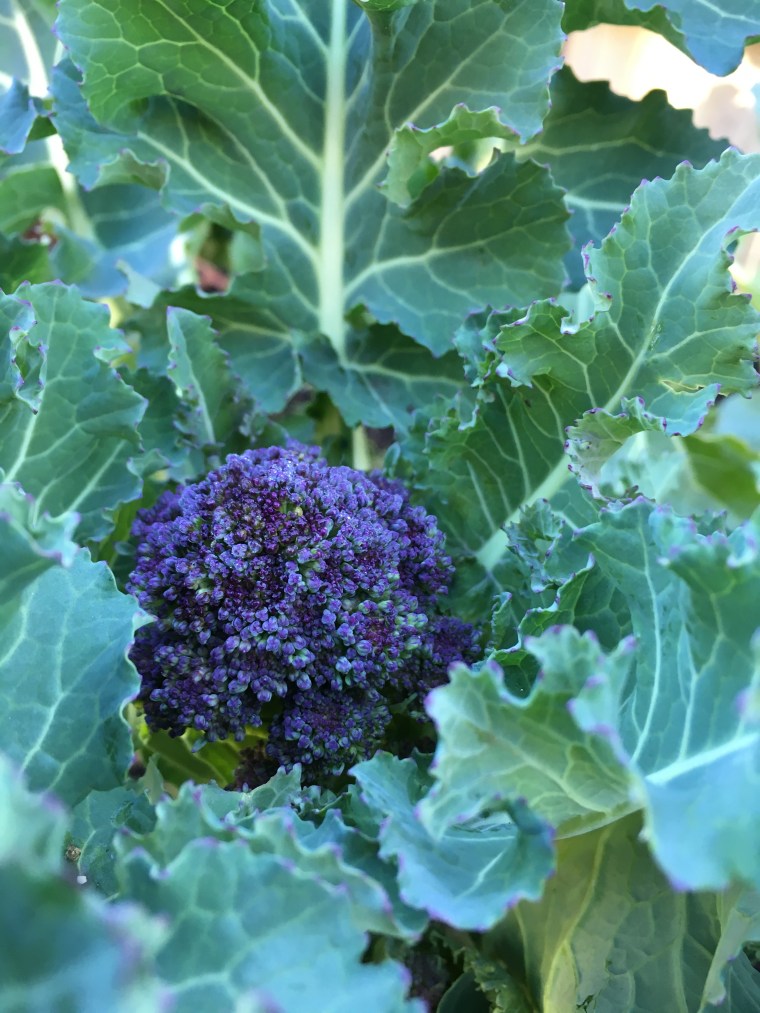
Purple Sprouting Broccoli February 2016Last night, I finally got around to seriously perusing the seed catalogs. I have been poking through them intermittently but last night I sat down with pen and paper to craft my list. I must say I was surprised to see how much seeds prices have skyrocketed this year. One of my favorite purveyors wants $5 for ten tomato seeds. This reality check sent me on a housecleaning mission this morning….it was time to inventory my unruly collection of seed packets. I have packets stashed in Ziploc bags in a box. Not the best system admittedly but it has worked pretty well…until now.

This morning I spent a few minutes sorting those packets by variety. I then took note of the date on each packet and how much was left in each packet. Even after that I realized my sorting wouldn’t be very useful while placing mail orders or buying off the seed rack at the garden store. I really wanted to have a quick way to survey my stock and decide if I need to risk using older seeds or if it would be better to buy new.

So, I decided to take an inventory and create an Excel spreadsheet, categorizing each type of vegetable and then noting the variety, date on the packet and how much is left in each pack. Now, some of you might be masters of the Excel spreadsheet…I must admit, however, that I’ve never done one for this type of project but it came out great and I can now easily sort and peruse exactly what I have and what I need. (I just Googled an inventory spreadsheet template, downloaded it and it worked great.)  I’ve even stored the list in my Dropbox so I can access it from my phone while shopping.

I suspect I will still buy a few more packets than I technically need but I think my little seed inventory sheet will be very helpful when buying, planning, and planting for 2016.

Duke’s Chowder House Publishes First Cookbook

Duke Moscrip, one of Seattle’s longtime and legendary restaurateurs, has just released his first cookbook. As Wild as It Gets: Duke’s Secret Sustainable Seafood Recipes is a hefty treasure to hold. Published by Aviva Publishing in New York and clocking in with a whopping 382 full-color pages, this book shares the recipes for all of the dishes served at Duke’s Chowder House.

Moscrip opened Duke’s in 1976 and the restaurant’s flagship dish, clam chowder, was inspired by Duke’s New England grandfather and the chowder that he served to Duke when he was a child. Over the years, the business has expanded and there are now six locations throughout the Puget Sound. Chowder remains a hallmark at the restaurant but over the years Duke has expanded the repertoire to include wild sustainable seafood much of which hails from waters here in the Pacific Northwest and, of course, Alaska.

The book, co-authored with Chef “Wild” Bill Ranniger, explores the story of Duke’s…and Duke…in great detail. Duke’s salmon sourcing trips to Alaska are highlighted as are family meals with his children and grandchildren.

I only received my review copy this morning and was pleased to be offered a copy as I cook a lot of seafood in my little kitchen. I’ve also eaten at Duke’s many times and a few years ago I wrote the press releases for the restaurant.   At first glance, the color photography in the book grabbed my eye and enticed my culinary instincts.  The recipes aren’t only geared towards seafood…they obviously run the gamut from soup to desserts.

Over the years,  I’ve admired Duke’s wedge salad, an iceberg classic,  so I was happy to see Sweet Blackberry Wedge Salad on page 116. The recipe for Nothing But Blue Sky Bleu Cheese is revealed and that’s one that is now on my recipe to do list.

After a quick glance through the recipes, I realized that I’d need to get organized and dedicate a little more time to recreating some of the dishes at home. Because these are restaurant recipes, there are often recipes within recipes, meaning to make a salad you have to make a specific dressing the recipe for which is found on another page. Some people might think this is too complicated to follow but it’s the nature of the beast when you recreate chef recipes.

That being said, even though I was short on time, I soon found myself rustling up ingredients and adapting one of the salmon recipes, “Wild Alaska Salmon Caesar Shoots” found in the “Appeteasers & Shared Plates” chapter. The photo shows little blackened salmon strips tucked snugly into romaine lettuce leaves drizzled with Caesar dressing.   In the recipe introduction, Duke mentions how he loves salads but salads require a bowl, utensils, a napkin, a chair etc. He said he liked this recipe because you have all the comforts of a salad but you can eat it with your hands! Aha! That description was perfect and it was all that I needed to launch into a spontaneous cooking session.  Admittedly, I didn’t follow the ingredient list exactly because I didn’t have all the spices handy for Duke’s Blackening Spice of Life. That being said, I used the technique described and the results were excellent…perfect finger food for Super Bowl Weekend.

So if you want to add to your seafood cookbook repertoire, check out this newbie. You will be inspired to not only follow the recipes but to use them as a culinary launching pad, tweaking and testing to suit your wild, wonderful and whimsical ways.


Process This: The Ultimate Salmon Burger Method

My husband and sons love to fish here in the Pacific Northwest. As a result, I always have a freezer full of flash frozen wild salmon. Pink. Coho. King. Hot smoked. Cold smoked. Over the years I’ve learned to use these nutrient-rich treasures in many ways.

In 2009, while judging the Alaska Symphony of Seafood, I perked up and took notice when fellow judge, Jordan Mackey, casually shared one of his tricks of the trade—how to make a good salmon burger.

“With this method, the burger stays really moist and you don’t have bread flakes or egg. They cook just great!”–Mackey

The Executive Chef of Seattle’s Edgewater Hotel at the time, Mackey explained, “I am not a fan of binders.  With this method, the burger stays really moist and you don’t have bread flakes or egg. They cook just great!” While many salmon burgers can indeed be laden with fillers, it was obvious that Mackey’s savvy method for using up trim and fat laden bellies was worth trying at home.

Mackey explained that after they trim the scraps from the fillets of salmon, they cut the salmon into small to medium dice. They then sprinkle the diced salmon lightly with kosher salt and a smaller amount of sugar. He then lets the mixture stand, chilled, for about 15 minutes. During this time the fish begins to weep and get slimy. It’s this natural protein laden slime that acts as the natural binder for the burger.  No panko! No eggs! No nasty additives!

Mackey then takes 30% of the mixture and quickly mixes it in the food processor to make a light chunky paste which he then stirs back into the diced salmon. Voila. There’s your basic salmon patty mixture! The restaurant presses this into 9 ounce patties and cooks them to medium rare in an omelet pan or Teflon skillet. (Mackey was careful to explain that his salmon patties and/or scraps are always previously frozen so any parasitic risk from eating medium rare burgers is minimized due to the freezing.)

Over the years, I’ve made these burgers many times, tweaking the ingredients according to whim and taste. Sometimes I take the classic route and just add lemon and dill to the mixture. When I am craving Asian, I add diced ginger, garlic, fresh cilantro plus a dash of soy sauce and sesame oil.  If I want a smoky Southwestern slant, I add some cumin and chipotle pepper.  While cooking the burgers I waffle between using a classic cast iron skillet and my beloved Le Creuset ridged grill pan. The grill pan creates great ridges and adds a touch of telltale smokiness to the burger.

Regardless of the flavors added or the type of pan used, the Ultimate Salmon Burger technique always results in a juicy and flavorful burger!

Note: I realize many readers probably don’t have whole fillets of salmon that need to have tips and bellies trimmed. Nonetheless, this method works great with previously frozen fillets or fillets purchased fresh at the store. The bottom line is that salmon burgers are a great way to add interest and flavor to a very nutritious seafood. 


Broccoli Salad Revisited

I often buy the large three pound bags of broccoli florets sold at Sam’s and Costco. Having a stash on hand makes it easy for me to work broccoli into the meal plan. Of course, the simplest approach is to steam or simmer it and serve it as a side. Sometimes my husband makes cheesy broccoli, or I roast the florets with a mess of other vegetables. The bottom line is that I always have broccoli around to experiment with.

Last night, thanks to my recent posts on winter salads, I was inspired to make a broccoli salad. The ubiquitous broccoli salad easily found online often uses raw florets, mayonnaise, raisins and sometimes bacon. This rendition is good but I wanted something healthier and a little more palatable. While standing in my kitchen I wondered: Could I soften and cook  the broccoli itself while at the same time keep a bright fresh color and appealing aroma? Could I add a seasonal fruit to create some natural sweetness thereby balancing the bitterness of broccoli?  Would nuts or seeds add crunch to replace that crispy bacon found in the other version?

I soon concocted this salad and dressed it with the Curry Cilantro Vinaigrette featured in yesterday’s blog post. One of the keys to this salad is cooking the broccoli only slightly and then plunging it into cold water to stop the cooking and keep that bright green color. This is a technique that is often used with green beans or when preparing vegetables for the freezer. It worked great in this salad!

The leftovers kept beautifully in fridge overnight and made a great lunch today. The curry flavor (and color) infused the salad even more and the broccoli and apple stayed appealingly crunchy. (Note: This photo was taken today so the salad looks a bit softer and more yellow than when I made it yesterday because everything had time to meld together in the fridge.)

Broccoli Apple Pine Nut Salad

Broccoli, Apple and Pine Nut Salad with Curry Cilantro Vinaigrette

3 cups chopped broccoli florets

1/2 apple, diced

2 scallions, sliced

1/4 cup pine nuts, toasted lightly

2-3 tablespoons curry cilantro vinaigrette, or dressing of your choice

Prepare the broccoli: put the broccoli in a pan, cover with water and simmer over moderate heat for about three minutes, or just until it turns a bright green color and is crunchy. Drain broccoli, rinse quickly with cold water and plunge into a pan of cold water to stop the cooking and set the bright color and crunch. Drain well. Chop the broccoli finer if desired.

in a large bowl toss the broccoli, apple, scallions, and pine nuts. Drizzle with about two to three tablespoons of dressing, or to taste, and toss well.  Season with salt and pepper.

Serves two to four.


Curry Cilantro Vinaigrette for a Winter Salad

Yesterday, I wrote about winter salads and in that post I mentioned using a robust dressing…one that can stand up to the bulky textures and flavors of cabbages and kale.

To follow up on that note, I decided to write about making a basic food processor vinaigrette in today’s post. Admittedly, I use bottled dressings in my kitchen. They add incredible convenience and if I choose carefully, they add flavor without a ton of fat. (I prefer the nonfat balsamic dressing from Trader Joe’s.)

However, there are many days when I make my own vinaigrette and without a doubt my trusty Cuisinart food processor or mini chopper is the tool for the task. Whisking the mixture in a bowl can do the trick but I find that my food processor lightens my dicing load and blends everything together beautifully.  I also like making my own vinaigrette because it saves me money and lets me tweak to my preference.

The basic approach is to use one part vinegar (or acid) to three parts oil. It’s then important to add an emulsifier, or blending agent, like mustard or garlic to hold the mixture together. I vary my vinaigrettes seasonally. In the summer when I make a rice and black bean salad, I make a garlic, cilantro and cumin-laced dressing. For those days when I am craving classic French salads, I make a tarragon shallot vinaigrette. Right now, because my garden is producing winter cabbages and kale, I am making hearty salads and reaching for robust vinaigrettes.

This morning, I made one of my favorites–a Curry Cilantro Vinaigrette. Using fresh ginger, lime, cilantro and curry powder, this concoction brings the warm flavors of curry and ginger to big bowls of crunchy seasonal produce. Here’s the recipe. Feel free to tweak it to your taste:

Curry Cilantro Vinaigrette

one 1 inch piece of fresh ginger root, peel and chopped into chunks

2 teaspoons curry powder

juice of 1 lime

1 Tablespoon honey

1/2 cup olive oil

1/4 vegetable oil

1/4 teaspoon sea salt

1/4 bunch fresh cilantro, leaves and stems included

In a mini chopper fitted with the metal blade, put the ginger root, curry powder, lime juice, and  honey. Blend for 30 seconds to chop the ginger root and combine the ingredients. Add the oils and the salt and process for 30 seconds to combine. Add the cilantro and process for another 15 t0 20 seconds to chop the cilantro. Transfer to a small jar and keep refrigerated. Makes about 3/4 cup.

Note: When using this vinaigrette, use a big bowl, toss well, add toasted seeds or nuts to the mix and toss in fresh seasonal fruit or  a little cheese if that suits your taste.


Warm up to Winter Salads!

Let’s face it.  Salad doesn’t get a lot of press during the dark days of winter. For sure it’s the stews, chowders and chilis that hog the limelight for much of the colder months of the year.

That being said, I still eat salad during the winter and the fact of the matter is that I simply craft my winter salads differently than my summer ones. In the summer, tender refreshing cucumbers, homegrown tomatoes, aromatic basil and light dressings rule the roost.

During January and February, I sharpen my chef’s knife and hunker down to use heartier produce like cabbage, kale, chard, carrots, red onions, apples, and pears. Over the years, I’ve learned that a winter salad can be downright satisfying when dressed with a more robust dressing and served with a warm soup.

Here are some tips on how to create and compose a satisfying winter salad:

Use the Boxed Mixed Lettuces as a Base

During the winter, I can’t grow enough lettuce to meet my  family’s salad needs so I rely on the large boxes of mixed organic greens or spinach sold at Sam’s and Costco. These lettuces offer tons of convenience because they are pre washed and make a solid foundation for building my salad. To prevent the greens from going mushy, I’ve learned to pull some out of the big  box and store them in separate plastic bag. By aerating and fluffing the greens I find that the greens keep better overall.


Winter Salad Kale Chard 2016Go for Color

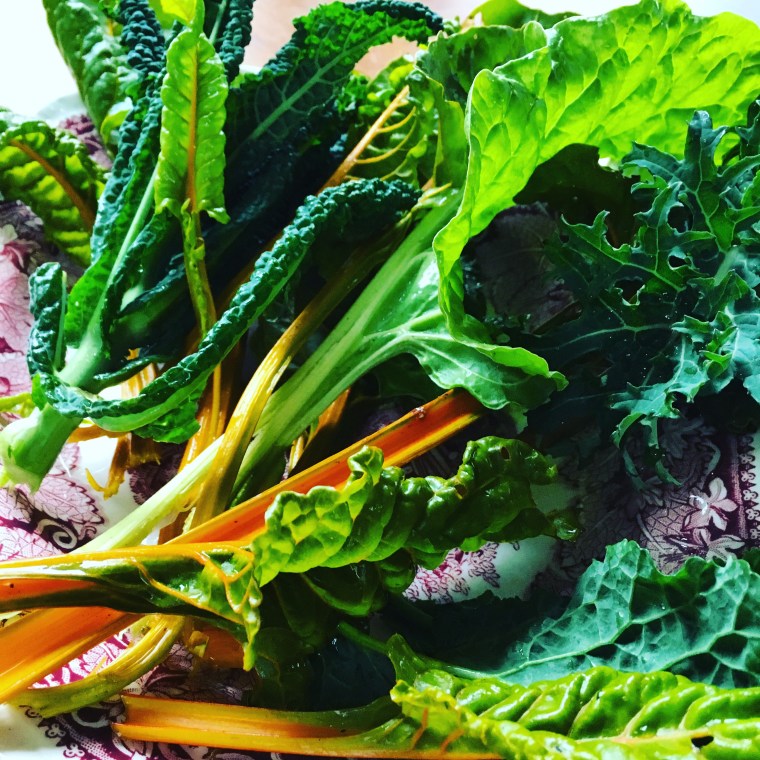
We all need more color in our lives during the winter months so when you start to plan a winter salad, seriously consider adding items like red cabbage, dark green kale, or colorful chard. The trick to using these sturdier brassicas is to sharpen your knife and slice them thinly. This can take some practice but it makes a huge difference. When working with chard or kale, stack the leaves, roll them up like a cigar and slice them crosswise, which will result in an array of thin ribbons. As for cabbage, cut the head into smaller manageable hunks and slice thinly over the leaves.

Add Some Crunch

Create some crunch by adding croutons, sunflower seeds, pumpkin seeds and even chow mein noodles. This might seem like an obvious tip but items like sunflower and pumpkin seeds can add a significant nutritional boost and a welcome nutty flavor that complement the whole shebang.

Winter salad wooden bowl 2016

Get a Big Bowl and Toss

Don’t underestimate the power of a big wooden salad bowl and an energetic salad toss. Yes, you can make a salad in a small bowl but during the winter months it’s a lot more fun to do it in a large bowl. After all, all of the winter salad ingredients are more robust than those found in a summer salad and they can certainly take the heat of a few hefty heave hos with the salad tongs. Furthermore, the added value of using a big bowl is that the salad dressing gets distributed more evenly and you thus have to use less salad dressing!


Master Techniques and Success Will Follow

When I worked at Gourmet, I made it my business to use every penny of my annual tuition money by taking hands on cooking classes throughout New York City. This involved working all day and then schlepping via subway to some small school in a remote corner of the city.

During the nearly six years I worked at the magazine, I learned recipes, tips, and techniques directly from such legendary cookbook authors as Jacques Pepin, Julie Sahni, Eileen Yin-Fei Lo, and Giuliano Bugialli.

I also attended dozens of hands on classes at Peter Kump’s New York Cooking School. Now called The Institute of Culinary Education, or ICE, the school gave me an amazing foundation. I clearly remember my first class there in 1989. It was taught by Peter Kump himself, and my first lesson remains one of my most memorable.

While sitting at the end of a long table, Peter lectured us at the end of class. It was nearly midnight, and he explained why it was more important to master knife skills and techniques more than specific recipes. He told us we would learn basic techniques, such as slicing, dicing and sauteing in his class entitled “The Techniques of French Cooking 1.” And, he assured us that culinary creativity and success would follow.

DSC_0143
Chioggia Beets

For example, he told us that once we learned how to sauté a chicken breast or a lamb chop, we could then apply that technique to a fillet of fish or a pork chop. He explained that once we mastered a technique, we would become more frugal shoppers because we could purchase what was on sale that week and apply that technique to the economical ingredients at hand. I glommed on to this approach because it seemed to unlock the mysteries of cooking for me.

As a mother, food writer, and home cook for more than 20 years now, I think the ability to master culinary techniques is more important than ever. As our national economy continues to slump and stall, it’s critical for home cooks, both seasoned and novice, to adapt and adjust menus and recipes according to what’s on sale, in season, and on hand. To me, it’s an intelligent approach that makes cents!  I now intuitively use those techniques whether I’m harvesting tomatoes from my organic kitchen garden or I’m shopping at the grocery store, the farmers market, or the fishmonger. Having that foundation embedded in my knowledge bank gives me the freedom to experiment with confidence.

What’s your opinion? And, what are some of your favorite resources for learning culinary techniques at home?  Admittedly, there are many now!

Note: This blog post originally appeared on Amazon’s Al Dente blog on February 28, 2010. I have edited and updated it slightly. 


Seattle’s Best Garden Resources

As someone who has been gardening in the Emerald City for twenty years now, I am rather opinionated about my green resources. I don’t have a huge garden or a perfect one for that matter, but I do have a kitchen garden that produces a lot of chow for my family of five.

Over the last two decades, I’ve learned to rely on some tried and true resources…the ones that give me great information, top quality reliable starts, friendly service, or just unusual plants that bring joy and diversity to my dinner table and my little urban oasis.

Sky Nursery-The Gardener’s Garden Store!

Family run since 1953, this large garden store is located in Shoreline, just north of Seattle. I head to Sky year round. During the winter months, I head there for bags of Cedar Grove Compost, Carpinato Chicken Manure, and soil amendments like Cascade Minerals Remineralizing Soil Booster. At Sky they make it easy for me to haul these hefty bags home because the guys in the pick up section grab the receipt and load everything into the back of my car. (At Home Depot, I’d be humping those bags from cart to car all by myself.)

When things are starting to spring to life in February, I rely on Sky’s massive greenhouse for inspiration and much needed respite from the dreary weather because the greenhouse is filled with primroses and forced bulbs. The staff is always informative and they have shared tons of information with me all these years. This is also when I start to mooch around their vast selection of seeds, potato starts, and vegetable starts.

Berries Geraniums Vertical Gardening
Kitchen Garden 2015

Swanson’s Nursery-Seattle’s Favorite Garden Store Since 1924

Tucked into a residential neighborhood, Swanson’s is where I have purchased all my edible fruit trees and berries over the years. My collection is pretty big now–two figs, columnar apples, grafted plum, espaliered cherry and pear, plus an array of raspberries and loganberries. Their dwarf fruit trees perform beautifully in my little urban yard. If you want to add some fruit trees to your garden, be sure to check out their Bare Root Sale coming up from February 11 to March 6th. Bare root fruit trees and berry canes are deeply discounted so it’s a great time to stock up and save. If you want information on Fruit Tree Health Care, check out this seminar being held at the nursery on January 23rd.

Seattle Tilth-The Garden Hotline! 

When I first moved to Seattle in 1995, I loved my new gardening climate but I had a lot to learn. I think it was the landlord at our little rental house who tipped me off to Tilth. And, oh what a great tip it was! Located in Wallingford at the Good Shepherd Center, Tilth became a wealth of inspiration for me. I became a member and visited their demonstration garden often. It was their hotline, however, that really got me digging. Whenever I had a random question, I’d call and they would answer. Admittedly, I haven’t had to call very often these days but it’s worth noting that their website is an excellent resource. Clearly their communal impact has expanded far beyond that land line I used to call. So, if you aren’t familiar with Tilth, check them out and mark your calendar for their annual March Edible Plant Sale on March 12th.

Northwest Flower and Garden Show-February 17-21, 2016

Although I haven’t been to the flower show in a couple years, I plan to go this year. For many years, my husband and I would go to the show, happily poking around and getting ideas, tips, and advice. For a while there it seemed that the show was losing some momentum so we didn’t go,  but this year it looks like they have their game on big time. Themed “America the Beautiful,” the show will feature 20 theme gardens, the massive marketplace, and a very impressive lineup of seminars covering everything from gardening with children to creating outdoor decor on a dime.

So even though it’s still rather dark and dreary out here in the Emerald City, rest assured that there are lots of delicious gardening resources ready to wet your whistle for the sunny summer months ahead. Do you have a favorite garden resource?