It’s here. The 2025 Copper River King and Sockeye salmon season has launched. The Simplicity Shines with Copper River Salmon Campaign is underway. And, as a result, I’m launching into further recipe development with these rich and robust wild salmon from Alaska.
Yesterday, I found some gorgeous fillets at the Edmonds QFC for $19,99 per pound. I had asked for an eight ounce center cut. However, the fishmonger cut a one pound piece with the tail end intact. I opted to take it.
The tail end of the salmon is often thinner than a center cut. It doesn’t generally have as much fat.These pieces lend themselves to some very inventive preparations one of which is my Salmon Slider technique.
I first developed my Kid-Friendly Salmon Slider recipe for Real Food Magazine back in 2010. I did this because the article was featuring how to stretch one pound of sustainable seafood. (The economy was in a serious rut back then so that’s how I devised that concept. And indeed history repeats itself so I am revisiting that concept!)
And on a purely practical level, I had been making these sliders for my own children and their friends for some time. Everyone loved them, and they always flew off the serving plate!
The sliders only use about one or two ounces of salmon per serving and they are a perfect bite-sized way to feature this wonderful fish economically. The sliders appeal to children. They also make great finger food for a party. They can even be a light easy lunch.
Yesterday, I took that tail end, rubbed it with the Salmon Rub from Market Spice located in Seattle’s Pike Place Market. I drizzled it with oil and baked it in my Breville Smart oven at 400 F for about 10 minutes. The tail end cooked perfectly. It easily separated into quadrants. This made it a snap to plop onto the small slider rolls. A quick homemade chop chop coleslaw and some tartar sauce finished the gig.
These simple sliders are a great way to get a taste of the season in small bites!
Note: These sliders used only about six ounces of that one pound I purchased. The remaining ten ounces or so were baked or grilled for super quick midday lunches. Again, stretching one pound of Copper River sockeye by using it in different ways!
Dubbed the Noble Fish over forty years ago, Copper River salmon is indeed a seasonal taste luxury that has withstood the test of time. Thanks to the rugged Alaska region this fish calls home, these salmon–king, sockeye, and coho–are some of the finest salmon available to consumers.
Inherently silky, rich, and robust, they are a seasonal taste that seafood lovers have been celebrating for decades now. When these fish hit the market fresh in May, the annual celebration of salmon begins.
There’s no denying however that these fish come with a price tag that some folks scoff at. The price does fluctuate each year and throughout the season, but for savvy seafood cooks, there are ways to still appreciate these all-American beauties while at the same time being fiscally savvy.
The answer?
Watch the sales in season and avoid any waste.
Buy the fish whole, if possible.
Ask the fishmonger to fillet it, and use all parts of it.
Get creative and try different seasonings and techniques.
Think beyond dinner. Use the trim for breakfast.
I’ve known this for years but last week I was reminded of this when I ventured to Town and Country Markets in Shoreline. Family owned and operated, T&C has, in my opinion, the finest full service seafood counters in the area. Their Big Board Sale Notice featured whole fresh Copper River Sockeye for $7.99 a pound ($17 off the usual price). The Big Board also noted that the fishmongers would fillet the beauties for free.
Without missing a step, I was off to see my favorite fishmongers. I asked for a big fat sockeye and requested that they fillet it and cut it into six-ounce portions. I also asked to keep the carcass, which included the bones, the backbone, the tail and collar because I was going to make stock.
At home, the salmon was gorgeous. Fresh and silky and a small piece cooked beautifully for lunch. Simply sprinkled with salt, drizzled with a little olive oil and seared on my Le Creuset grill pan it cooked in minutes. Served over salad it was great.
This little exercise got me thinking.
How many ways could I use the salmon, fillets, carcasses, collars and even that swanky tail?
When I went back on Sunday to get another salmon, there was a line of seafood lovers patiently waiting and chatting to place their order for a Copper River salmon. The staffers were still serving everyone at a fast clip and with a smile!
I mentioned to one customer that I was going to use the fillets in a variety of ways and that I was going to vacuum pack some with my Food Saver to make easy lunches in the next month or so. She got on board and requested her fillets be cut into 6 ounce “lunch size portions”. She, too, was going to vacuum pack hers.
When she rejected the carcass and bones, she offered them to me and said, “No Bones about it. You can have em!” We all laughed and I was happy to snag them!
Another mom alongside with a baby in tow, got in the conversation. She asked me the best way to have hers cut. I told her to have them filleted and cut into six-ounce portions as the portions are a bit easier to cook than a whole fillet. She loved that idea.
When the guy asked her how she wanted hers cut, she pointed to me and said, “The same as her.”
Clearly, the love for fresh Copper River salmon, with its superior quality, remains a stalwart here in Seattle.
Well, I thought, of course those same techniques apply to a whole Coopper River Sockeye…And so my little experiment began.
My husband and I laid out all the pieces when I got home. We had gorgeous “lunch size” fillets, plus the tail ends, plus the carcass with the backbone and pin bones, Then I had the collars, which still had hunks of meat and cartilage. And I had the swanky tails which in many ways made me think of a mermaid…
So, here’s a little lineup of my creations this week:
Grilled on a Le Creuset Grill Pan
My first easy dish was to simply salt a six-ounce fillet, spray with a little oil and sear it on my preheated Le Creuset Grill Pan. I flipped it and finished the cooking on the other side. It was done in short order and made a great topping for a simple salad.
Sockeye Tagine with Cilantro
Next up? A Moroccan inspired tagine. The traditional clay tagine was perfect. It’s cone shaped dome naturally steamed the sockeye and it came out perfectly cooked and moist. Although most homes don’t have tagine at hand, the concept of baking the fish covered (perhaps lightly with foil) is one that can easily be adapted. The traditional flavorings of onion, garlic, pepper, cilantro and cumin added some culinary spunk to the dish.
Mermaid Broth
Next up? Go for the Stock Option! I don’t normally make fish stock with salmon bones, tails and collars but with these beauties I did. (For stock I generally use white fish such as halibut and cod.) I simply rinsed the carcass, added it to a large Dutch oven and then sprinkled on savories such as carrots, onions, celery and herbs. The tail flopped over the edge of the pan and I immediately chuckled and imagined a mermaid! The medley was gently simmered on the stove for about an hour. I let it cool, strained it and let it cool further. The fish stock came out clear and lightly flavored with scent of the sea. It went into a Leek and Tarragon sauce that I drizzled over yet another six-ounce fillet.
For Stock Option Round Two, made with another carcass, I used ginger, garlic, lemongrass, carrots, celery, scallions to bring some Asian influence on the project. I might use this in a coconut curry sauce of some sort…. still working that one out.
Monday Eye Opener
On Monday morning, I needed a power boost before launching at my desk, so ITook a tail end of the fillet, and with a sharp knife carved off some flesh strips on an angle. I seared those in a pan for about 20 seconds each side, salted and drizzled with a dash of olive oil. They were great with poached eggs and sour dough disks. And, frankly, it really did keep me fueled through the morning, which was great! My Cronometer Nutritional Tracker noted increases in protein and Omega Three fatty acid intake for breakfast that day, so Monday was off to a solid start!
The Bottom Line
I am still working through other concepts, but the bottom line is keep your eyes open for fish market specials featuring Copper River Salmon while its fresh and in season. And, when you do purchase these beautifies, ask questions, experiment and use it all up. Whether it’s bits of trim, the carcass, or the leftovers!
If you want more tips on using Copper River, fresh and in season, check out the tips I wrote last year for the Copper River Prince William Sound Marketing Association. Forty Tips to Enjoying Copper River Salmon.
For some background on the fishery itself, check out Forty Years of Fresh, which I wrote and which explores the history of how this fish made the leap from being relegated to cans to being celebrated fresh at markets and restaurants throughout the country.
My Other Posts on Salmon
Process This: The Ultimate Salmon Burger Recipe-this is a wonderful method for creating a salmon burger without the added fillers of panko, egg, and it uses small bits and bobs of the fish.
What’s on your plate during these dark dreary winter days?
For me, it’s been the wild and wonderful winter seafood of the Pacific Northwest.
Yes, I know that sounds a bit odd. Seafood always hits the hot button during the summer months when we naturally pair it with sunshine and sea breezes.
That said, in January and February I was drawn to the fabulous seafood counters we have here in the Emerald City. During the rare moments when I can escape my desk, I often choose to visit the supermarket and troll the produce and seafood counters, watching the sales and in store specials for inspiration.
In January, I noticed that retailers in town were featuring fresh Pacific Rockfish, a wild whitefish harvested in the cold offshore waters. On sale for less than $6 a pound, I dove in and bought a few fillets. At home, I decided to take a French inspired approach and, after pin boning the fillets, crafted a basic herb sauce to top the baked fish. A delicious success that sent me back to the fish counter.
For Round 2, I rustled up a crab stuffing which I mounded on the thin fillets and created a tidy bundle. The packages baked in the oven while I raced off to another task. This second success sent me back to the seafood counter at Shoreline’s T & C Market where I chatted with the young fishmonger who totally agreed it was a winner of a local wild fish and pointed me to the Rockfish poster nearby. Although he couldn’t tell me which species of rockfish they were featuring (there are many!), he happily wrapped up a few more pounds so I could stash them in the freezer.
Shortly thereafter, I eyed some fresh Pacific Winter King Salmon fillets, although price at $39 a pound, they looked stunning in the seafood case at the market, and were from Southeast Alaska, which is renowned for being some of the best. Back at home, a pound of that beautiful king was wrapped into French inspired medallions which I seared on my Le Creuset ridged grill pan and finished in the oven.
Oui! Oui! Bon Appetit! I was on a roll….
Winter King from Southeast AlaskaFresh Local Dungeness Crab Fresh RockfishWhole fresh cooked crab from Pacific Seafood at Winco Fresh Rockfish Big Board Buy at Shoreline T&C MarketsWinter Luxury inspires French Entree. Rockfish Species Poster at T&C MarketsWatch those weekly specials! Fresh Local Dungeness Crab
Next up? Local Dungeness Crab. I love this cranky crustacean but during the Pandemic the prices skyrocketed and after visiting Merino’s Seafood Market in Westport last summer, I shifted toward their spectacular canned Dungeness which I have been happily using all winter.
That said, when my local QFC, Winco, and Costco were featuring these fresh cooked beauties for less than $6 a pound, I dove in, bought a bunch, and got cracking at home! My first round was simply steamed in my Le Creuset wok, picked by my husband and me over newspaper at the kitchen table and served with a stunning Garlic Ginger Soy dipping sauce that I created. The ginger was the perfect counterpoint to the briny richness of the crab.
My husband gathered the crab shells and made a superb crab stock. I went back for more and stashed the whole crabs in the freezer.
Finally, this week, Fresh Wild Pacific Cod from Alaska is showing up. I love Pacific Cod as it’s a buttery blank slate that lends itself to being served in the most basic way over mashed potatoes with garlic green beans or chard on the side. But it’s also great turned into endless other creations. Shoreline T & C Markets is currently featuring big buttery fresh fillets of this cold-water fish and I’ve purchased two large fillets just since the sale started. A quick check to remove any pin bones and a generous salting with La Baleine sea salt, sets this fish on the path to success. Placed in an au gratin pan with some lemon slices underneath, drizzled with a reduction of fish broth, wine, and butter, and baked in a 375 oven until warmed through, It’s a very cozy preparation.
When I recently reflected on all this stunning local and wild seafood being featured at markets this winter, I began to wonder WHY. It feels different this year. I’ve lived here for over 28 years now and have trolled these counters for nearly a generation now.
When I questioned my friendly fishmonger (yet again!) if something was shifting…he looked up from the case while preparing my order and said, “You know, I think it is…I think we are seeing more this winter.”
Indeed, I do believe there is a shift and I’d like to think that more of our domestic wild and wonderful seafood is being kept here in the local American markets. With a global pandemic, disrupted supply chains, and international wars, the pivot to local and American seems stronger than ever.
It’s a big bright spot for me as we schlep through the dark days of winter, waiting for those breezy days at the beach!
The Emerald City is living up to its reputation this week. Cold. Rainy. Dark. Ugh.
Yesterday, I was craving a light and lean salmon lunch but I couldn’t bear to make a salad so I decided to shift gears and focus on using some king salmon in soup. Chowder was too heavy so I started to explore pho as a reasonable option.
The more I thought about it, the more I liked the idea and began to wonder if I could devise a simple technique that would cook the salmon but simultaneously safeguard the fish’s buttery texture and telltale flavor.
Working quickly, I loaded my InstantPot with some chicken and vegetables, set it to high pressure for 25 minutes and headed to the Asian market in my neighborhood for some cilantro, Thai basil, fresh rice noodles, and Napa cabbage.
At home shortly thereafter, my soup came together in mere minutes. The hot simmering InstantPot broth was a ladled into a Le Creuset saucepan with finely shredded cabbage, a few slices of ginger, and about an ounce of rice noodles. That simmered for about two minutes and was poured into a pho bowl. I then added about two ounces of finely sliced skinless salmon into the steamy broth and let the salmon cook gently in the residual heat of the broth. I then added a final garnish of herbs and sliced jalapenos and my light and lean Gingery Salmon Pho was ready for slurping!
So, here is the basic and easily adaptable method for making a quick pho at home:
Step One:
Put about two cups of chicken broth into a small saucepan. Bring to a rapid simmer over medium-high heat.
Step Two:
Add about a half cup of finely sliced Napa cabbage , a few slices of fresh ginger, and about one ounce of rice noodles. Simmer for about two minutes, stirring once or twice.
Step Three:
Pour the steaming broth carefully into a deep bowl, top with about two ounces of thinly sliced and skinned fresh salmon. Using chopsticks, gently poke the salmon into the hot broth to submerge it and to help it cook in the hot broth.
Step Four:
Garnish with finely chopped fresh cilantro, Thai basil if available, and thinly sliced jalapenos. Serve!
Peonies. Prince William Sound Salmon. Cruise Ships. Tourists. Sunshine. Sea Breezes.
Local peonies are stealing the show at the Pike Place Market right now!
The Pike Place Market I visited today is much different than the one I visited last January. Of course, TECHNICALLY and structurally it’s the same as it was back in January but this morning. the market wasn’t tenuously navigating Seattle’s unpredictable January weather.
Today, the market was strutting her seasonal stuff and loving it! Once again, I had to be downtown very early so after I “checked the box” on an errand well before 7:30 AM, I decided to stroll down the hill and head to the market. It was bright and sunny, and I figured it would be a great time to beat the crowds and see what’s coming in locally.
Alas, when I arrived I again found quiet streets and walkways. My first destination? The flower vendors who were clipping and arranging thousands of local peonies. One of my favorite flowers, the incredible array made me swoon. As much as I love to garden and have success with many things, my attempts to grow peonies have failed repeatedly. These bodacious pink orbs, frankly, made me green with envy! I didn’t buy any simply because I didn’t want to cart them all over. That being said, they were a bargain and the prices ranged from $10 a bunch to $20. Local. Seasonal. Gorgeous beyond compare.
On Ice: The King of all Salmon. This one from Alaska’s Prince William Sound
Next stop? The fish stalls. All the guys were sporting their waterproof orange pants, spraying the walkways, scooping crushed ice onto displays and answering questions from early birds like me. At Pike Place Fish Market they didn’t have any Copper River King or Sockeye because it’s been a rough season up there this far. They did have a massive 25 pound Prince William Sound king in a huge bin filled with ice. The adjacent tabletop display of Prince William Sound sockeye nearby also impressed.
Anticipating the Cruise Ship Crowds and Taking a Breather!
After that, I was ready for a breather so I traipsed over to the nearby park to do a little people watching and eyeball the massive cruise ship docked nearby. As I examined that Norwegian behemoth from afar, I knew the crowds from within would be emerging and heading towards the market so I beelined to breakfast at nearby Seatown, one of Tom Douglas’s restaurants. The Fried Egg sandwich with avocado, Bavarian Meats bacon and a side of crispy hash browns was just what I needed before trekking back UP the hill to catch my bus.
Seatown English Muffin Egg Sandwich with a Side of Bavarian Meats Bacon
While schlepping up to Third, I realized that the Market is indeed a living entity that shifts with each Seattle season.
On February 1, The Wall Street Journal ran an article entitled, “Instant Pot Anxiety? ‘I said a Prayer and Stayed the Hell Away.'”
In the piece, the author, Ellen Byron, interviewed various pot owners who had mishaps and struggled with operating the all in one appliance. I chuckled at some of the stories but admittedly the author was on to something. Every day when I peruse the Instant Pot Facebook feed, I see photos of Instant Pots in sealed boxes and cries for help and advice on how to take that first step to use the appliance. The posts weave into an interactive digital therapy session where fellow Instant Potters exclaim, “You can do it.” “Just start.” “My favorite easiest recipe is….” “Wear goggles and keep the kids outta the kitchen.”
As for me, I love my two Instant pots (6-quart duo and 3-quart mini) and use them daily without fail. Personally, I have never had pressure cooker anxiety because I started using the Kuhn Rikon stove top pressure cookers over twenty years ago. That being said, I can understand why some people hesitate. There are lots of buttons, The manual isn’t great. And, once you lock and load, commit to pressure and things start to rumble. there’s no turning back and you can’t open the lid and check the contents. It is indeed a leap of faith.
My solution for those folks who fret? Take the Instant pot out of the box, run the simple water test per the manufacturer’s instructions and make YOGURT!
Both of my machines have yogurt buttons and this cycle does NOT require putting anything under pressure. It simply creates a low heat that incubates your milk and starter and turns it into the rich luscious yogurt over the course of 8 hours. A miracle cycle in my mind!
I’ve tried various yogurt recipes but my favorites have come from This Old Gal and the only recipe I use now is her Instant Pot No Boil Yogurt Recipe which uses the whole Fairlife Milk found in many mainstream grocery stores such as Target, Safeway, QFC, and Winco. This particular milk does not require any preheating before making the yogurt so all I have to do is pour my half a gallon of whole milk into my 3 quart Instant Pot and whisk in two packets of YoGourmet starter. I then put on the lid, press the Yogurt Cycle and leave it alone for 8 hours. There is no pressure. No noise. No steam. No wiggles or jiggles. Just a quiet incubation on the counter.
At the end of the cycle, the mixture has transformed into thick luscious creaminess. I then put my all natural yogurt, still in the Instant Pot’s inner container, into my fridge, covered and let it sit, undisturbed, overnight.
I use my yogurt on everything from granola and citrus segments to baked potatoes and kale salads. And, I’ve discovered that it makes a great tartar sauce to dollop on Alaska halibut or salmon.
So, if you want to buy an Instant Pot but are feeling, well, pressured…skip “manual” button and go for Yogurt.
Even if you never make anything else, the savings from making your own yogurt will pay for the pot in no time.
Tartar Sauce. It’s a classic accompaniment to fish. It’s great on a fish sandwich or with a piece of fried halibut or cod or baked salmon.
That being said, it isn’t a great accompaniment to the waistline. My favorite brand, Marina Tartar sauce, packs a walloping 180 calories and 20 grams of fat in two tablespoons. Two tablespoons? Let’s face it. Who really sticks to serving sizes? So, I bet it’s safe to say the calorie count on a tartar sauce accompaniment to a fish sandwich can run far higher than 180.
Tackling this juggernaut has been on my recipe bucket list for some time but it was only recently that I nailed a real solution. I bought an Instant Pot back in August and have been making some really gorgeous yogurt in it every week. (I use the recipe from This Old Gal.) I generally have two quarts of homemade yogurt on hand each week and as a result, I have been finding all sorts of amazing ways to add this creamy protein-packed ingredient into my everyday meals.
That’s where my low-fat tartar sauce comes in. On Saturday, I had a piece of defrosted Alaska halibut in the fridge and some white hamburger buns on the counter. Both needed to be used up and I was in recipe development mode. So, I decided to make a halibut sandwich and that’s when the idea for yogurt tartar sauce was born
Admittedly, I was a bit doubtful. I tossed the idea out to my husband. He was really doubtful. Nonetheless, I went at it, substituting my yogurt for the mayonnaise and adding Western Family dill relish, some diced Walla Walla onion, the juice of half a lemon and some salt. A quick stir resulted in a luscious tartar with all the flavor of the classic and far less fat. Dolloped on a piece of cooked panko coated halibut it was a revelation.
The recipe that follows is ridiculously simple. If you don’t have homemade yogurt, storebought is fine. If you use Greek yogurt, you might need to thin it with a bit of milk to get that dollopy texture. Thin it a bit in the beginning, then add your relish, onion, and lemon juice, and if the texture needs adjusting, add a bit more milk or lemon if desired
Yogurt-Tartar Sauce
1/2 cup homemade plain yogurt, or store-bought plain Greek yogurt
2 to 3 teaspoons prepared dill relish, I used Western Family
1 to 2 Tablespoons chopped sweet onion
juice of half a lemon
salt to taste
In a small bowl, whisk or stir the yogurt to loosen and smooth out. Add the relish, the chopped onion, the lemon and salt to taste. Stir to combine and if using Greek yogurt, add a little milk or more lemon juice to adjust the texture. Make 1/2 cup.
I created this halibut salad this weekend after we had some friends over for dinner. My husband had cooked about three huge pieces of halibut from our June trip to Alaska and we had about a pound of cooked halibut leftover. While cleaning up on Saturday, I put it in the fridge. On Sunday I decided to do something with it to avoid waste.
My taste buds steered me towards a lemony Scandinavian flavor profile that day…I had attended the Nordic Culinary Conference here in Seattle back in May and I think it was those thrifty creative chefs—Claus Meyer, Sasu Laukonnen, and Titti Qvanstrom— who inspired my path that afternoon. At the conference, the chefs discussed how they avoid waste, use local ingredients, and employ simple techniques to ramp up inherent flavors and achieve impressive dishes.
So…while staring at a Pyrex dish full of flaky white fish, I challenged myself to make a fresh and appealing salad with the leftover. Rather than just mix it up with some mayo which is the traditional route to go for those who do employ leftover fish in their kitchens…I decided to ramp up the flavors.
Leftover fish can be a tough sell. I wanted a “refresh”.
So, I looked in the fridge and the garden and pulled my Cuisinart forth on the counter. My food processor is crucial for challenges like this. It speeds the process and makes fish tidier to work with. From the garden, I gathered a handful of dill, and a rummage through the fridge yielded some decent celery and a big voluptuous lemon. With that, I had a game plan!
The key to my Halibut Refresh? I added lemon juice BUT I added it at a critical point.
I didn’t want to dilute that burst of sunshine. I wanted to make sure it played a key role so I sprinkled the juice directly on the halibut and processed the halibut, celery and lemon BEFORE I added the mayonnaise. I am convinced that this simple sequence in steps made an enormous difference in my end result because the lemon got mixed into the fish and the fish absorbed it, becoming light, sunny, and citrusy in the process. I then added the dill and the mayonnaise.
Here’s the recipe. A ridiculously appealing Alaska Halibut salad with definite Scandinavian tilt. I enjoyed it on piece of Larsen’s Bakery Light Finnish Rye. A match made in heaven.
Lemon and Dill Halibut Salad
3 celery stalks, cut into big chunks
8 to 10 ounces cooked halibut (poached, grilled or baked is fine), broken up into chunks
1 large lemon, rolled on the counter and then juiced*
2 to 3 tablespoons fresh dill
2 to 3 tablespoons low fat mayonnaise, or to taste
Salt to taste
To Serve:
For serving: slices of lightly toasted rye bread and fresh Bibb lettuce leaves
For garnish: citrus zest, thinly sliced red onion, extra dill
Put the metal blade in the food processor, add the celery chunks and process the celery with three or four pulses to chop it. Put the halibut in the food processor, drizzle the lemon juice directly over the cooked halibut. Pulse once or twice to mix and incorporate the lemon juice. Add the fresh dill and the mayonnaise and pulse three or four times just to mix. Taste for seasoning and add salt to taste.
To create an open faced sandwich: Serve the salad on lightly toasted rye with a piece of lettuce and garnished with zest, extra dill, and thinly sliced onion if desired.
*Lemon Tip: To extract the most juice from a lemon, roll it on a counter before you juice it. You can also prick a couple holes the lemon, zap it in the microwave for twenty seconds, roll it on the counter and then juice it. These little techniques go a long way towards extracting all that sunshine from a lemon!
A trip to Homer, Alaska, at the height of the fishing season and only two days before the summer solstice can only mean one thing. A bucket list on steroids. My husband, son and I flew up to Alaska last week and it was a quick and tightly focused trip to see some clients, do research, fish, and explore the region.
When we were planning the trip beforehand, we decided to rent an RV from Great Alaskan Holidays in Anchorage. Chris has done this before but this was the first time I was embarking on the RV rental gig. We ran some numbers beforehand and realized that renting an RV and driving it the four hours to Homer out on the Kenai Peninsula was far more economical than flying down there, staying in hotels, renting a car, and eating out. The RV also gave us complete freedom to organize our trip according to our schedule and needs. And, combined with the daily 21 hours of daylight at this time of year, we were able to maximize our time in a very remote location.
After flying from Seattle to Anchorage we were greeted at the airport by the rental company shuttle which took us to the facility where we checked in, watched a safety video, and loaded our Minnie Winnie with gear, clothing and food. Our Minnie Winnie was spacious, gorgeous and appointed with Cuisinart cookware, bed linens and fluffy towels. We rented a toaster and the coffee pot.
Our first night was spent in Seward, Alaska simply because we didn’t want to drive so long after leaving from Seattle that morning. We stayed at a municipal campground in town, watched the cruise ships navigate into the dock, marveled at the massive halibut and rock fish haul on display and then left early the next morning for Homer, the Halibut Capital of the World. Located on the Kachemak Bay and in the shadow of Kachemak Bay State Park, this place is a nature lover’s paradise.
The spacious and clean Heritage RV Park, located right on the Bay, became our home for three nights. Sitting right on The Spit and adjacent to the local (and stocked) fishing lagoon, this RV park is also within walking distance to town and the marina. This proximity to the attractions worked great because we didn’t have to unhook the RV and trek the lengthy rig in to town to see the sights. Our site was right on the beach and had some of the best Alaskan scenery I have ever experienced. We didn’t have to eat out because our fully equipped kitchen was stocked and ready.
During the three days, we covered a lot of territory even though the Spit is relatively small in size. Fishing for halibut. Making tacos at a local cooking school. Losing a BIG fish in the lagoon. Discovering a new water trail around the Bay, Watching fishermen fillet their fish. Kicking back and enjoying the Midnight Sun. Watching the sun set and indulging in Klondike Bars and berries at midnight on Father’s Day.


 So, here is the basic and easily adaptable method for making a quick pho at home:


 Tartar Sauce. It’s a classic accompaniment to fish. It’s great on a fish sandwich or with a piece of fried halibut or cod or baked salmon.
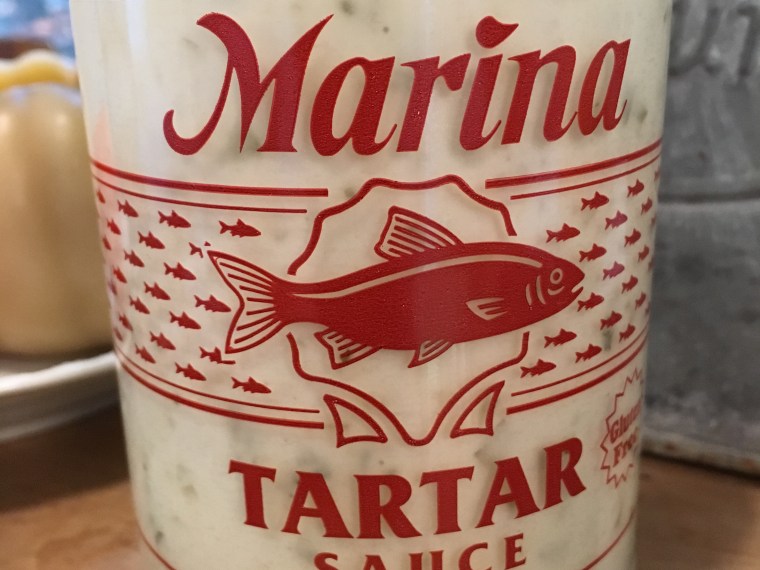 Tackling this juggernaut has been on my recipe bucket list for some time but it was only recently that I nailed a real solution. I bought an
  The recipe that follows is ridiculously simple. If you don’t have homemade yogurt, storebought is fine. If you use Greek yogurt, you might need to thin it with a bit of milk to get that dollopy texture. Thin it a bit in the beginning, then add your relish, onion, and lemon juice, and if the texture needs adjusting, add a bit more milk or lemon if desired


 A trip to Homer, Alaska, at the height of the fishing season and only two days before the summer solstice can only mean one thing. A bucket list on steroids. My husband, son and I flew up to Alaska last week and it was a quick and tightly focused trip to see some clients, do research, fish, and explore the region.